Getting to know Hāpara Teacher Dashboard Follow

This articles gives teachers an overview of Hāpara Teacher Dashboard and its features.
In this article:
- How to access Hāpara Teacher Dashboard
- Using student tiles in Hāpara Teacher Dashboard
- What student tiles show you in Teacher Dashboard
- How to use the Teacher Dashboard toolbar
- Sort student tiles in Teacher Dashboard
- How to navigate Google Drive folders
- Share files button in Teacher Dashboard
- Teacher Dashboard features and best practices
- Additional tips
Hāpara Teacher Dashboard gives teachers a single place to see and open students’ recent Google files, give feedback, share resources, and manage class info.
Use Student Tiles to preview/open work, and the toolbar (Search, Drive, Groups, Sort, Size, Refresh) to quickly find and organize what you need. Share files distributes documents to individuals, groups, or the whole class in a click.
How to access Hāpara Teacher Dashboard
Go to app.hapara.com.
Sign in with your school Google account.
Select your class to open and click the Dashboard tab.
Tip (IT/Admin): If teachers can’t see classes, check roster syncs/permissions in the Hāpara Admin Console.
Using student tiles in Hāpara Teacher Dashboard
What student tiles show you in Teacher Dashboard
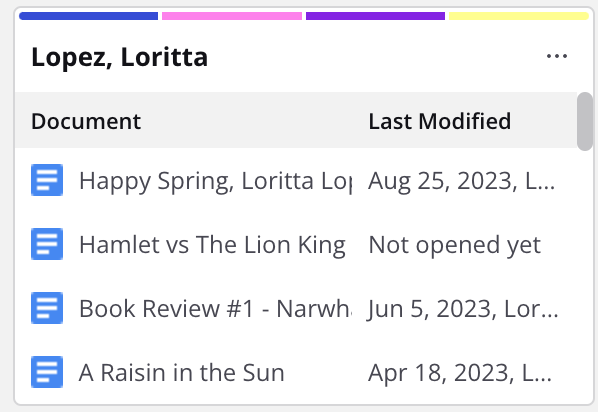
A student tile in Teacher Dashboard shows you:
- The student's name
- The groups belong to
- The student's most recently accessed Google Drive files (when you hover to preview)
- The file's last modified time
- A student tile menu where you can open the learner’s Drive folder, email the student, or edit groups.
Common actions that you can take from a student tile in Teacher Dashboard
Hover to preview the latest file.
Click to open the file to leave feedback.
Email a student with guidance.
Change groups (for differentiation).
Open the student Drive to locate work.
How to use the Teacher Dashboard toolbar
Search bar in Teacher Dashboard
Find a file by title/keyword across tiles.
Drive button in Teacher Dashboard
Search files across students’ Drives to find missing work or check sharing.
Groups in Teacher Dashboard
Create/edit groups and filter the view to specific groups.
Sort student tiles in Teacher Dashboard
A‑Z by first or last name (resets any manual drag order).
Size in Teacher Dashboard
Toggle compact/default student tile size to fit your preference.
Refresh in Teacher Dashboard
Update tiles to see new/edited files in real time.
How to navigate Google Drive folders
You may have access to subject folders in the white toolbar. If your class uses subject tabs, each tab lists files in that Google Drive subject folder. This is helpful for multi‑subject primary classes.
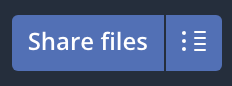
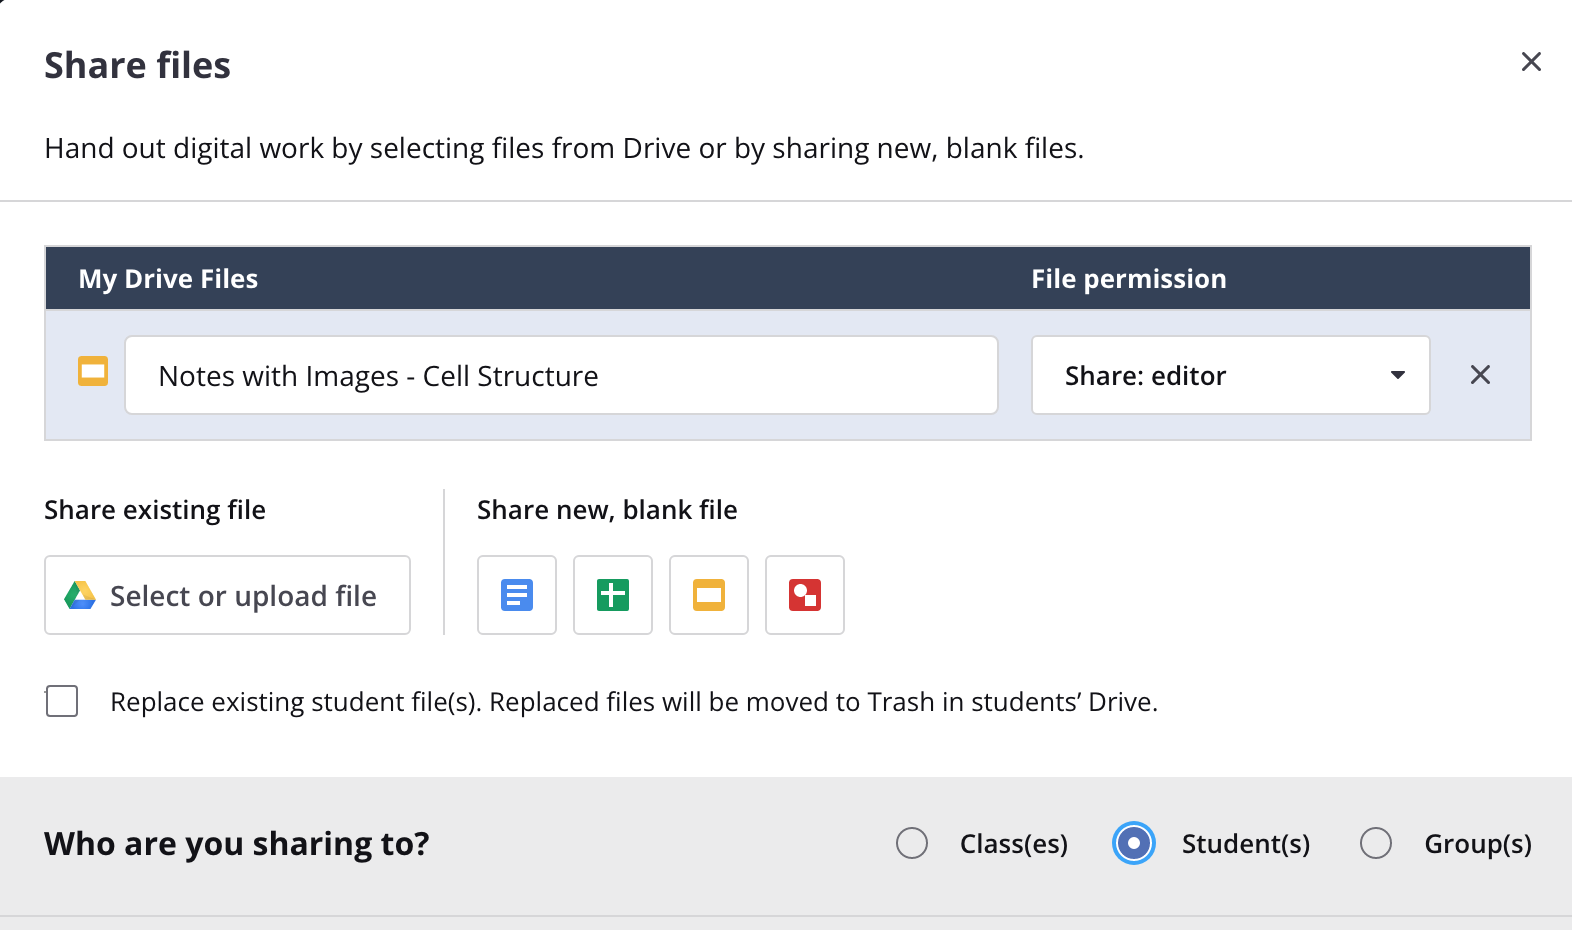
Share files button in Teacher Dashboard
Use Share files (top‑right) to distribute a file from Drive or create a new one on the spot. You can share to individuals, groups, or the entire class, and set permissions (e.g., each student gets an editable copy or view‑only class resource).
Teacher Dashboard features and best practices
| Teacher Dashboard feature | What it does | Where to find it | Best practices |
|---|---|---|---|
| Student Tile | Shows each learner’s latest Google files, last modified time, and quick actions (email, groups, open Drive) | Your class Teacher Dashboard — one tile per student | Hover to preview work; click to open and leave feedback; use the student tile menu to email or adjust groups for differentiation. |
| Teacher Dashboard toolbar | Customizes how tiles appear so your view matches your teaching flow | Upper right (white area) | Filter by Groups to focus feedback; Refresh to check real‑time progress; Size tiles for whole‑class vs. conferencing; Sort quickly A‑Z. |
| Search bar | Locates a file across tiles by title/keyword | Right side (gray area) | Use when a student can’t find a file or when you need to jump to a specific assignment. |
| Drive button | Searches across students’ Drives and surfaces file activity | Top area, near toolbar | Find “lost” files or verify sharing settings when troubleshooting access. |
| Class Info tab | Lets you manage class details (roster, co‑teachers) and send class emails | Dark blue tab area, top‑left | Keep roster current; use email class for reminders; reset passwords/folders if enabled by your admin. |
| Share files | Shares files to individuals, groups, or the class; sets permissions (edit, comment, view) | Top‑right | Create a new file from here to quickly differentiate tasks; give each student their own copy for submissions. |
| Subject folders | Lists student files by subject, if your class uses subject tabs | White tab area | Use during multi‑subject blocks to scan recent work by subject and open the right artifact fast. |
Additional tips
Differentiate in seconds: Build groups (e.g., “Needs Review,” “Extensions”) and filter tiles to target feedback.
Speed up feedback: Open files from tiles in new tabs and leave comments while students work.
Troubleshoot quickly: Use Drive + Search to find missing work; use Refresh to confirm edits are coming through.
Admin insight: If teachers don’t see certain options, they're likely restricted by district settings (expected).